Simple Bench [Outdoor Furniture]
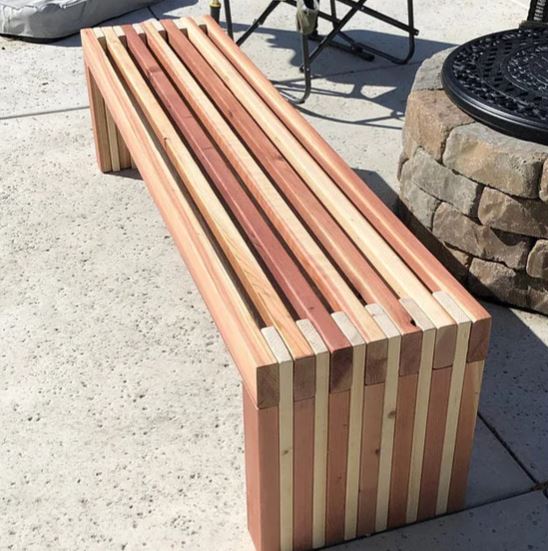
Note: All projects performed following instructions found on this site are done at your own risk. Learn more
Project Type: Bench
Estimated Cost: $20 - $50
Room: Teens, dining room, entry way, Outdoor
Skill Level: Beginner
Style: Modern Style Furniture Plans
Materials List:
- 9 - 2x4x8'
- 3 - 1x4x8'
- 2" exterior grade wood screws or finish nails Wood glue Optional
- 1 1/4" and 2 1/2" Pocket Hole screws if desired
Tools:
Note: As an Amazon Associate, I earn from qualifying purchases.
General Instructions:
Please read through the entire plan before beginning this project. Take all necessary precautions to build safely and smartly.
Work on a clean level surface, free of imperfections or debris. Always use straight boards. Check for square after each step.
Always predrill holes before attaching with screws. Use glue with finish nails for a stronger hold.
Wipe excess glue off bare wood for stained projects, as dried glue will not take stain.
Be safe, have fun.
Cut List:
- 7 - 2 x 4 x 70"
- 14 - 2 x 4 x 14 1/2"
- 12 - 1 x 4 x 18"
Step 1:
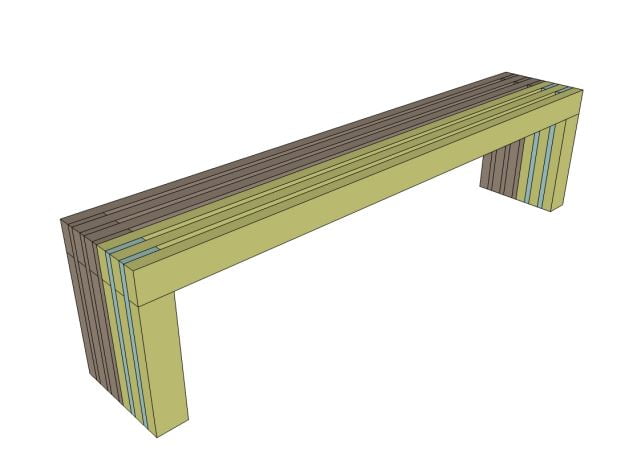
Choose your best looking 2x4 top board and leg boards. Set them best looking side down on the table. We'll be working from the front backwards.
Lay out 1 long 2x4 and 2 short 2x4s. Position the 1x4 on top, apply glue and nail or screw down, to both the top and leg 2x4s.
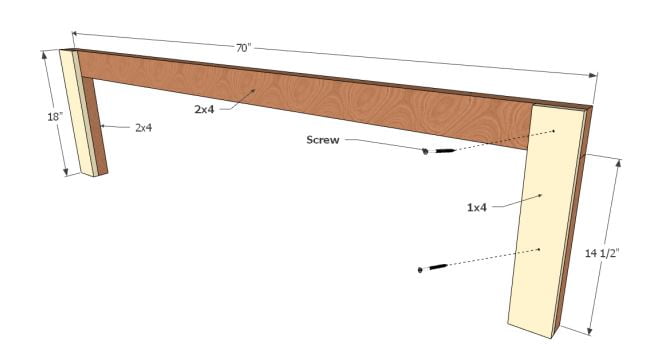
Note: Unless you are spray painting, it may be difficult to paint between slats. You may wish to paint or stain all of your 2x4x70" long first. Leg boards you will not have this issue.
Step 2:
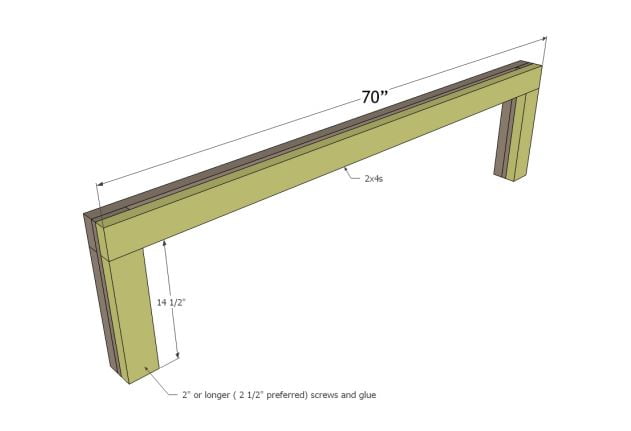
Add a layer of 2x4s on top of the 1x4s.
Step 3:
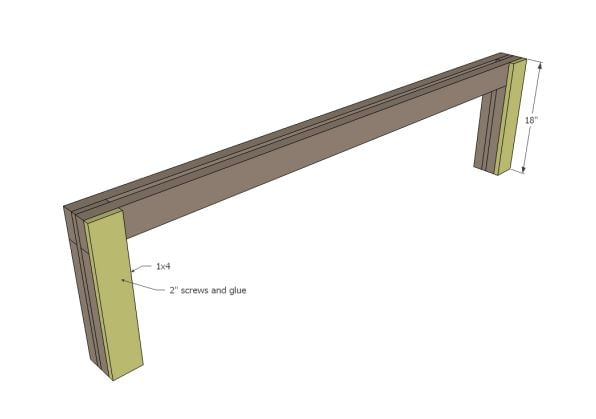
Next, repeat with a layer of 1x4s, nailing or screwing into both the top and leg 2x4s.
Step 4:
Continue until you run out of boards
Finishing Instructions:
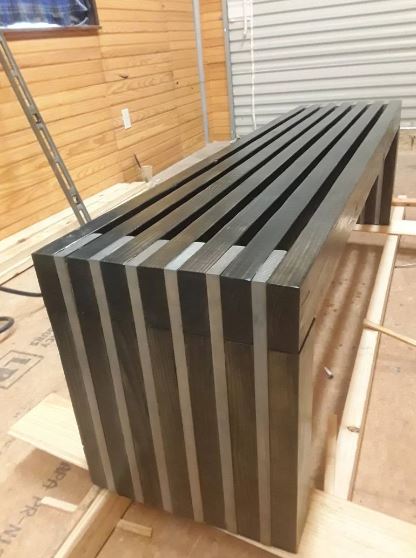
Fill all holes with wood filler and let dry. Apply additional coats of wood filler as needed. When wood filler is completely dry, sand the project in the direction of the wood grain with 120 grit sandpaper.
Vacuum sanded project to remove sanding residue. Remove all sanding residue on work surfaces as well.
Wipe project clean with damp cloth. It is always recommended to apply a test coat on a hidden area or scrap piece to ensure color evenness and adhesion. Use primer or wood conditioner as needed

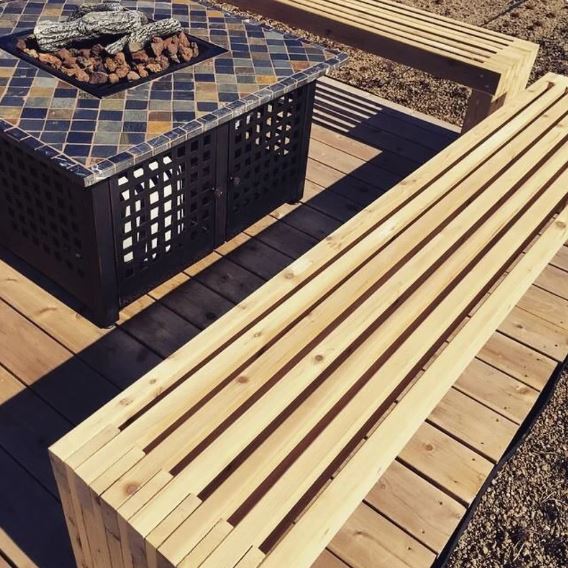
I hope you enjoyed this project as much as I did and I hope this plan was helpful!
