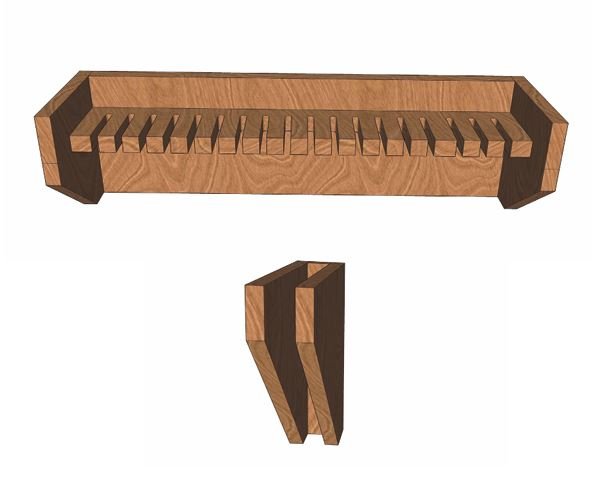
How To Build Clamp Racks

Note* These instructions will assist you in building 2 of the most popular styles of clamp racks. These will accommodate the vast majority of woodworking clamps in the market. The dimensions shown will build one 24” section of slotted clamp rack and one 9”x9” modular clamp rack. The dimensions can be altered to accommodate your specific needs. All dimensions are in standard measurements (inches).
DISCLAIMER: By Downloading these plans you are acknowledging that you claim all responsibility for any injuries, actions or damages that may occur when building or using this project. Learn More

MATERIALS LIST
WOOD
3/4” Plywood 24”x30” or Other Scrap
HARDWARE
- 1.5” Wood Screws. (Approx 7)
- 1.25” Wood Screws. (Approx 5)
- 1.25” Brad Nails
TOOLS
Note: As an Amazon Associate, I earn from qualifying purchases.
PLYWOOD CUT SHEET 1 (Slotted Clamp Rack)

PLYWOOD CUT SHEET 2 (Modular Clamp Rack)

SLOTTED CLAMP RACK - PREP COMPONENTS 1

SLOTTED CLAMP RACK - PREP COMPONENTS 2
Measure and Mark Components
- Measure and mark a line 1” from the edge of the 3.5”x24” peice as shown below.
- Measure and mark an intersecting line every 1.25” down the length of the piece.

Drill Holes
Drill a 3/8” hole on each mark made in the previous step. (This step can be done with a drill press or handheld drill)

SLOTTED CLAMP RACK - PREP COMPONENTS 3
Mark Cut Lines
Using a square, extend a line from both sides of each hole

Cut Slots
- Using a band saw or jig saw, cut along the lines drawn in the previous step.
- Sand components (Sandpaper wrapped around a pencil works well for getting into the slots)

SLOTTED CLAMP RACK - PREP COMPONENTS 4
Measure and Mark Side Pieces
- Measure and mark each 6”x6” piece as shown below.
- Cut out the shape. (This can be done with a miter saw, band saw, or table saw)
- Sand components.

Measure and Mark Side Pieces
- Measure and mark a line 1.5” and 2.25” from the edge of the 6”x24” Panel. This will be the location of the slotted piece.
- Flip the panel over and mark the same locations on the back side.

SLOTTED CLAMP RACK - ASSEMBLY 1
Align Slotted Piece
- Apply a bead of wood glue between the lines drawn in the previous step.
- Align the slotted piece in this location and clamp it in place.

Attach Slotted Piece
- With the slotted piece firmly clamped in place, turn to the back of the assembly and tack it in place with 1.25” brad nails.
- Drill and counter sink holes then secure with wood screws.

SLOTTED CLAMP RACK - ASSEMBLY 2
Attach Side Pieces
- Align the side pieces as shown below
- Attach the side pieces with wood glue and brad nails and/or screws.

Make and Attach a French Cleat (Optional)
- Cut a 45 degree bevel along one eldge of the 3”x24” piece.
- Attach to the back of the clamp rack as shown below using wood glue, brad nails and 1.25” wood screws.
SLOTTED CLAMP RACK COMPLETE!
Congratulations!
Your Slotted Clamp Rack is complete.

MODULAR CLAMP RACK - PREP COMPONENTS
Cut Components To Size
Measure and Cut 3/4” plywood into the pieces shown below.

Measure and Mark Side Pieces
- Measure and mark each 9”x9” piece as shown below.
- Cut out the shape. (This can be done with a miter saw, band saw, or table saw)

MODULAR CLAMP RACK - ASSEMBLY
Assemble Components
Arrange components as shown below and fasten together with wood glue and brad nails or screws.

Make and Attach a French Cleat (Optional)
- Cut a 45 degree bevel along one eldge of the 3”x2.75” piece.
- Attach to the back of the clamp rack as shown below using wood glue, brad nails and 1.25” wood screws.
MODULAR CLAMP RACK COMPLETE
Congratulations!
Your Modular Clamp Rack is complete.


