How to Build a Special Patio Bench
Note: All projects performed following instructions found on this site are done at your own risk. Learn more
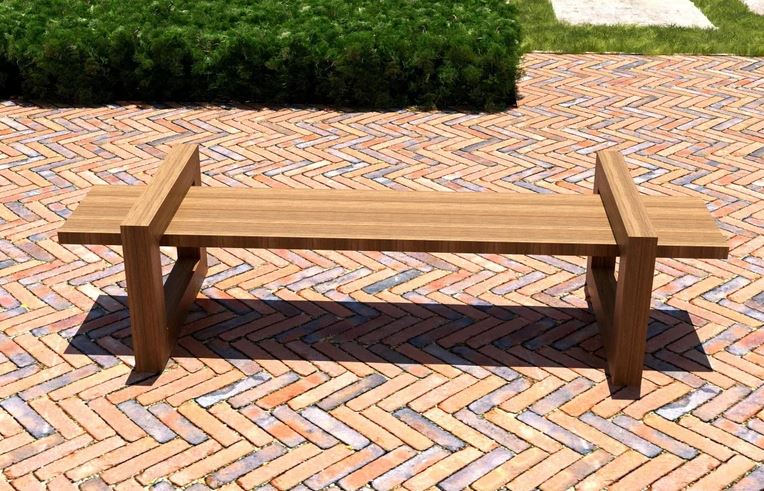
The construction of this patio bench is simple.
It has a beautiful style that suits your living space.
The screws we will use will provide durability.
Building this patio bench will be both funny and budget-friendly.
Please read carefully to learn how to make a patio bench.
In this plan, you will have patio bench plans, dimensions, and detailed instructions.
Please review them carefully so you will under patio bench when to cut and organize the pieces.
The patio bench-building process starts with legs and supports.
Hardwood or pressure-treated boards are a popular choice, as well as cedar and cypress.
Pressure-treated timber is less stained, durable, and budget-friendly.
1) Starts by checking the list of tools to use for your DIY patio bench. After collecting the missing tools, focus on purchasing materials.
2) Measure and cut all the pieces and prepare them. Measure the length twice before doing your cuts. Make sure to label each one.
Tips: Drill pilot holes in wood pieces using a power drill for easy connections.
3) Follow the Project details for assembling the wood pieces.
4) We will use 2 1/2" thin wood screw, 5" desk screw.
5) You will secure use wood glue to the contact surface.
6) Fill any gaps and frame nail holes with wood putty.
7) Sand the entire Project with 150-220 grit or more sandpaper and dust of before painting or staining your finished Project.
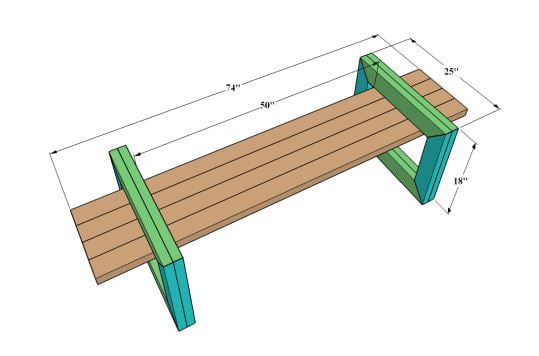
Cut List :
A1 - 8 – 2 x 4 x 18″ front and rear parts of rectangular feet 12'
B1 - 8 – 2 x 4 x 25″ upper and lower parts of rectangular legs 16' 8''
C1 - 4 – 2 x 4 x 74″ mid supports between feet 24' 8''
Total : 2x4x53' 4''
List of tools:
- Tape measure
- Saw
- Drill, nail gun
- Countersink drill bit
- Wood glue
- 2 1/2" thin wood screw, 5"desk screw
- Sanding, air compressor,
Stain/preferred paint coating:
- Water-Based Pre-Stain Wood Conditioner
- Water-Based Wood Stain mixed: Desert Sand and Pure White
- Water-Based polyacrylic
Note: As an Amazon Associate, I earn from qualifying purchases.
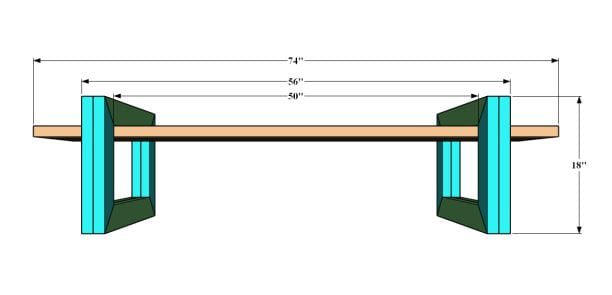
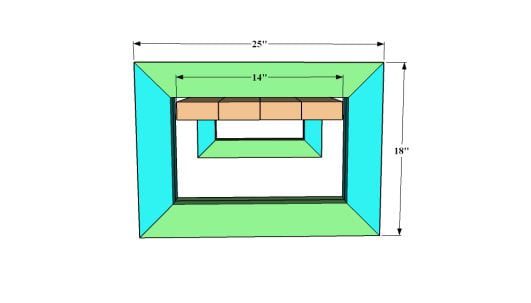
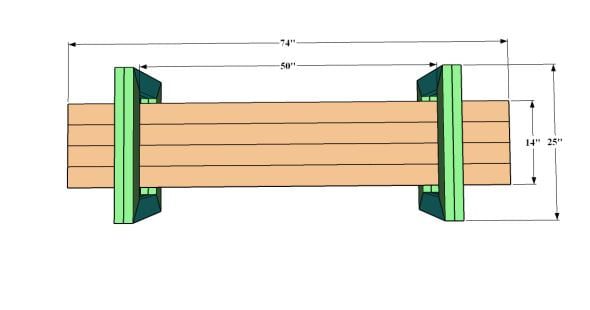
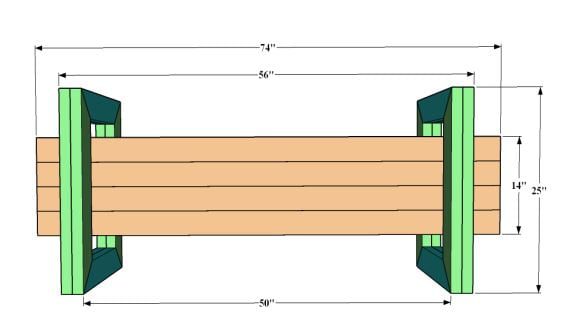
General Dimensions:
Front View:
Side View:
Top View:
Bottom View:
Assembly Process:
Step 1
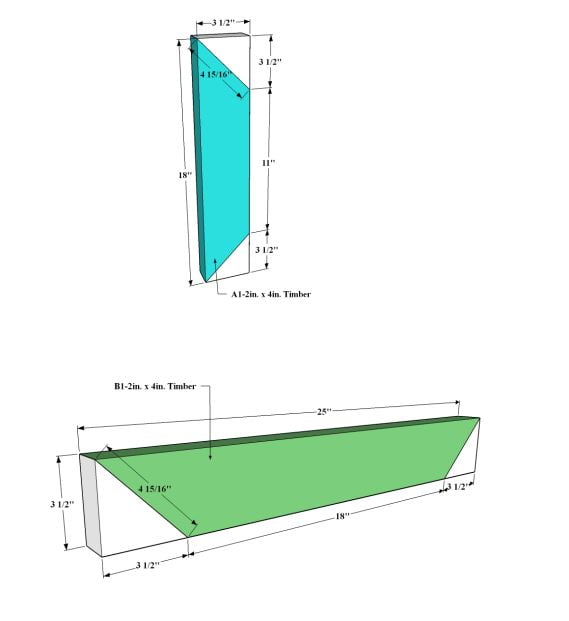
First of all, we cut both ends of A1 and B1 parts at a 45 degree angle as shown in the picture.
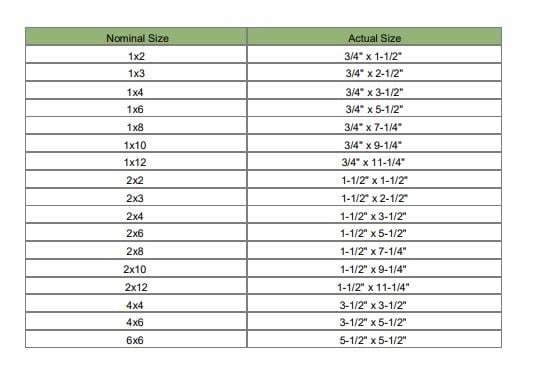
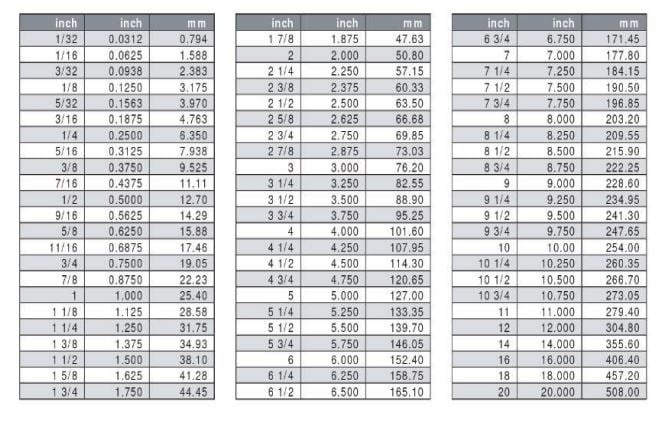
To make it easier, we measure and mark 3.5 inches up and down from the top and bottom ends.
Then we draw a line from the marked part with a pencil so that it coincides with the corner.
We do the same operation on the back side and cut over the line.
We repeat these operations in 8 pieces of A1 and B1.
Step 2
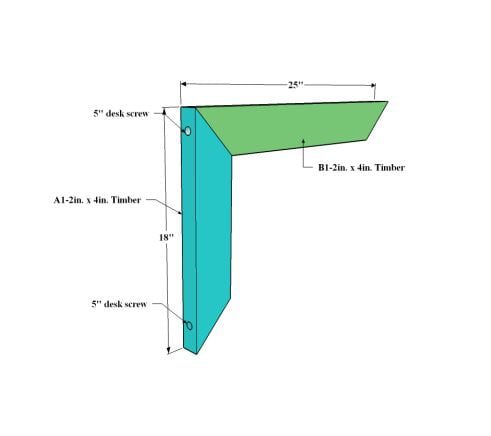
Now, we connect the ends of the parts A1 and B1 so that the corners coincide as shown in the picture and glue them with wood glue.
After drying, we screw it from the outside using 5'' table screws. It will make our job easier to do the screwing operations as specified in the notes.
Screwing the screw by heating will prevent damage to the wood.
Step 3
Now we glue and screw the 2nd A1 piece to the other end of the B1 piece as in the previous process.
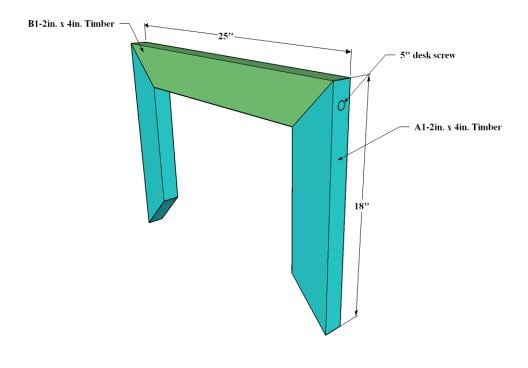
Now we repeat these operations 3 more times for the other legs.
Step 4
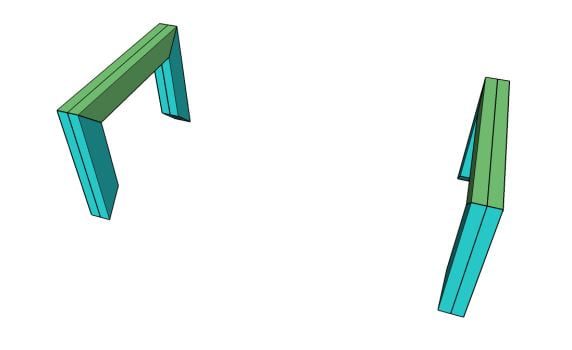
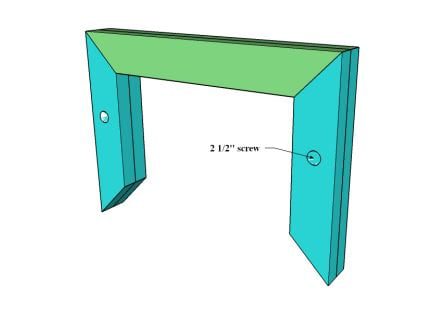
In order to increase the strength of the feet, we apply wood glue between the two feet, then we attach them side by side and screw them from the inside or outside as in the picture.
We use 2 1/2" screws here.
Step 5
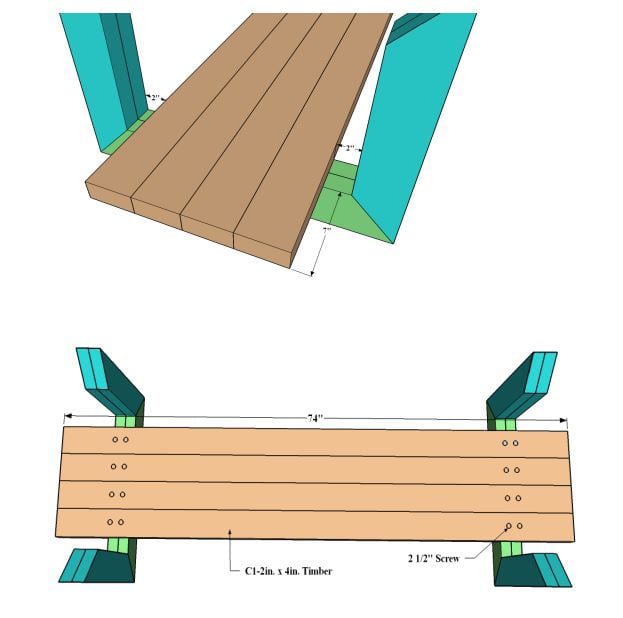
Now we place the C1 top boards on the B1 pieces with 2 inches of space at the top and bottom ends as in the picture.
After adjusting this, we adjust the C1 parts one by one so that there is a distance of 7 inches outward at the right and left ends.
We can draw with the help of a pencil. If you are sure that the distances are correct, we glue the contact surfaces with wood glue.
Then we place and paste the other C1 parts in line with the C1 part we placed first.
After the drying process is completed, we screw it with 2 1/2'' screws from the right and left ends, as in the picture.
Step 6
The upper boards of the seating bench must remain upside down as in the picture.
Now we place the B1 pieces between the A1 legs by applying wood glue.
After drying, we screw it from the outer parts.
Here we use 5'' screws.
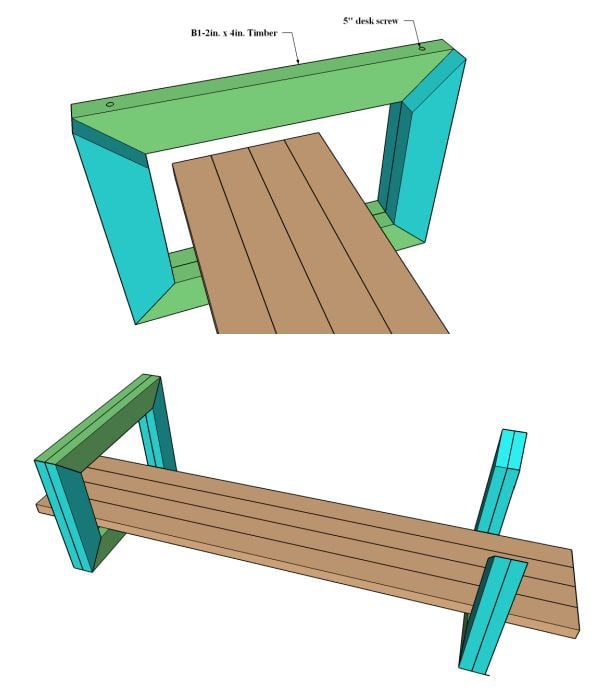
This is how we connect the other legs, respectively.
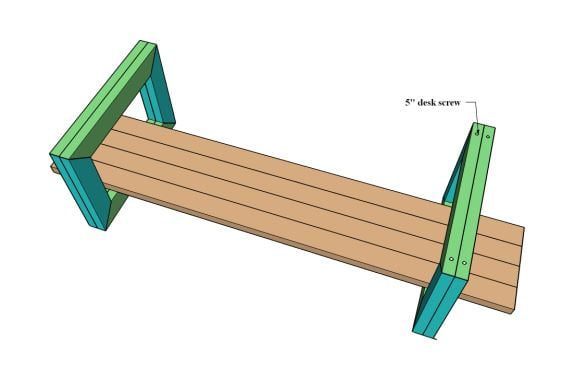
Finally, we turn the sitting bench.
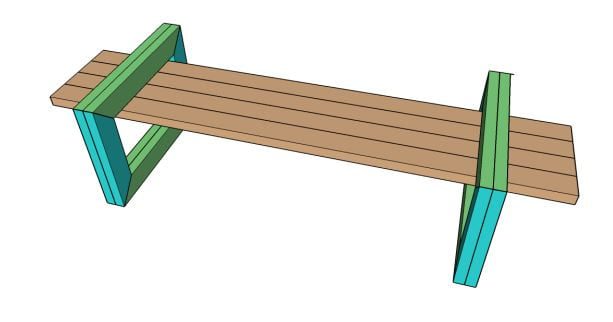
Thus, we complete our patio bench project!
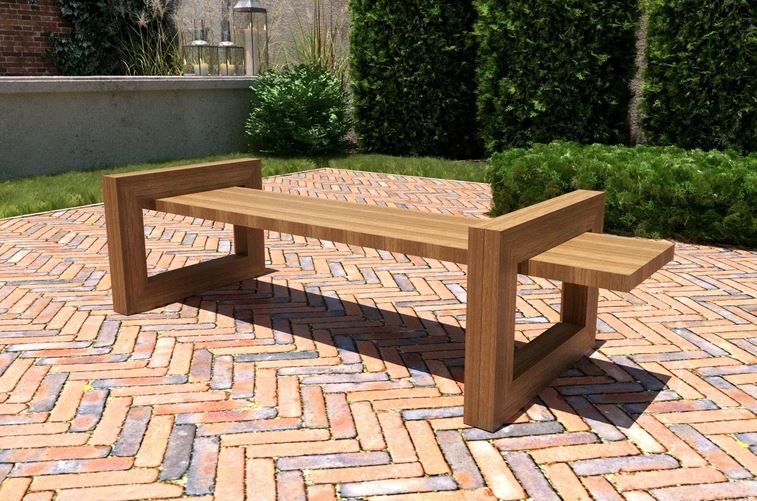

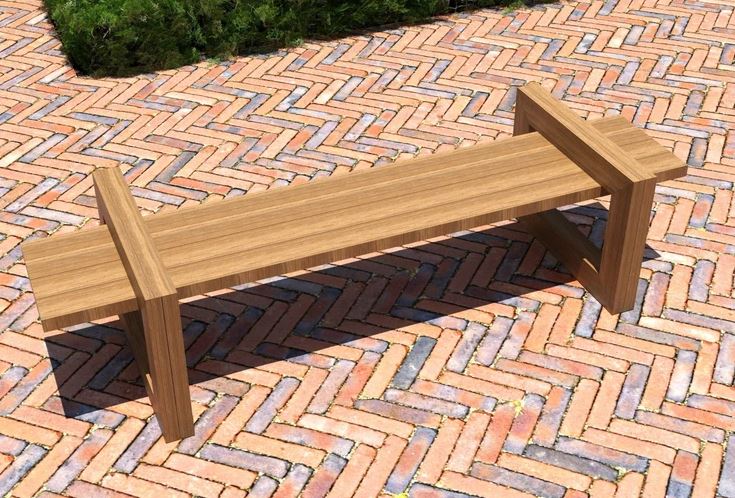
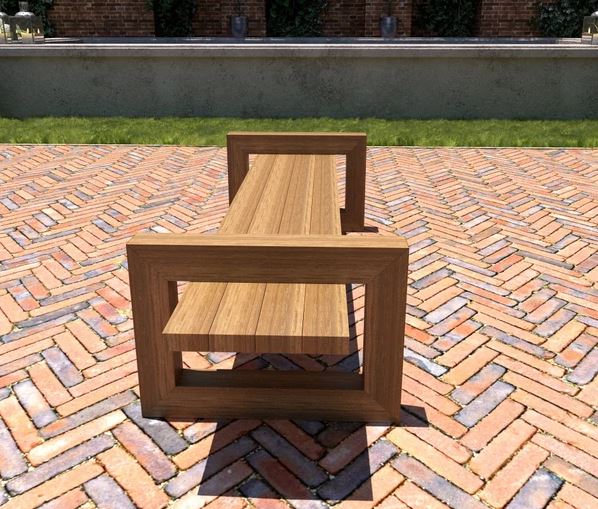
It is not only simple and easy to build, but also looks attractive and fits well into nearly any space, style, and decor.
