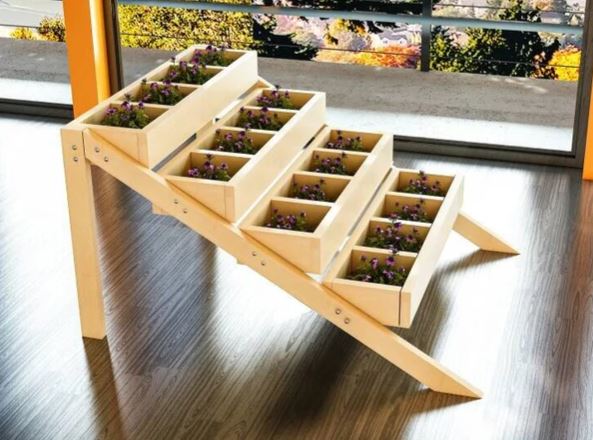
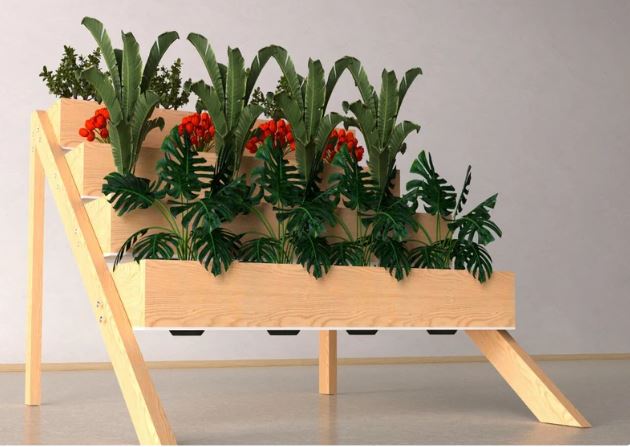
How To Build a Ladder Flower Pot
Note: All projects performed following instructions found on this site are done at your own risk. Learn more
Cut List:
(A1) 8 - 2x6 x 47 1/2" (flower pot edging pieces) 31’8’’
(B1) 20 - 2x6 x 10" (middle pods) 16’8’’
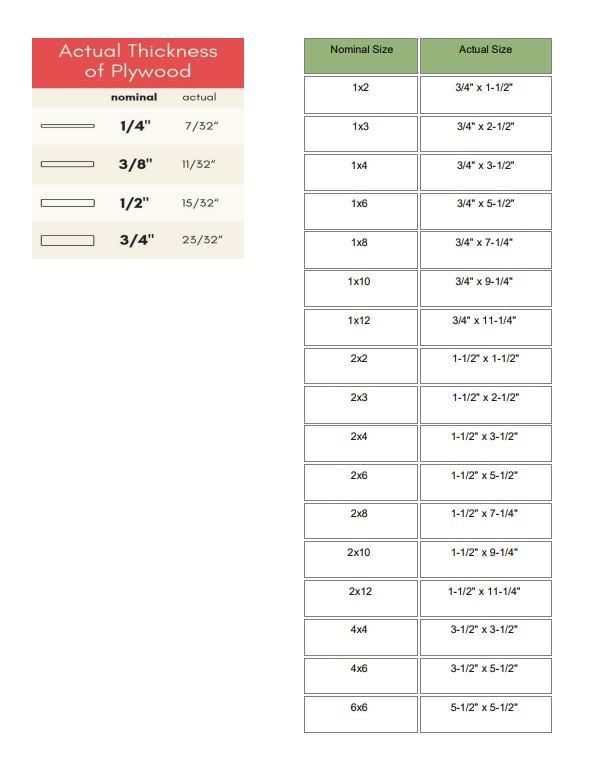
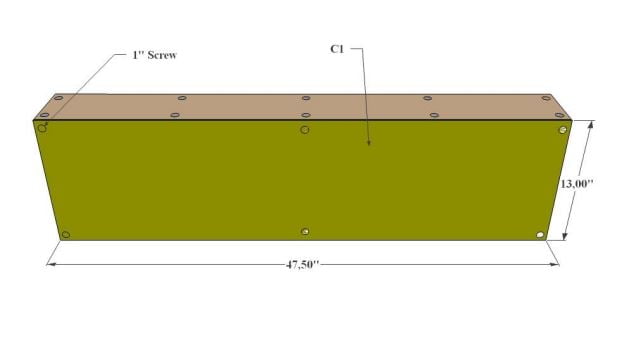
(C1) 4 - 1/2’’x13’’ x 47 1/2" (under pot plywood) 15’10’’
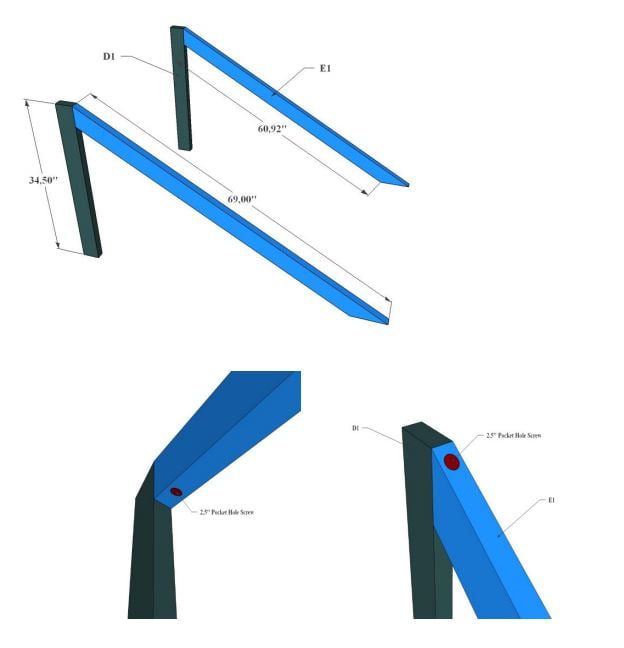
(D1) 2 - 2x4 x 34 1/2" (legs) 5’9’’
(E1) 2 - 2x4 x 69" (side supports) 11’6’’
List of tools:
- Tape measure
- Saw
- Drill
- Countersink drill bit
- Wood glue
- 2 1/2" pocket hole screws, 2 1/2" screws, and 1" screw
- Sanding
- wood glue
- wood filler
- sandpaper and finishing supplies
Note: As an Amazon Associate, I earn from qualifying purchases.
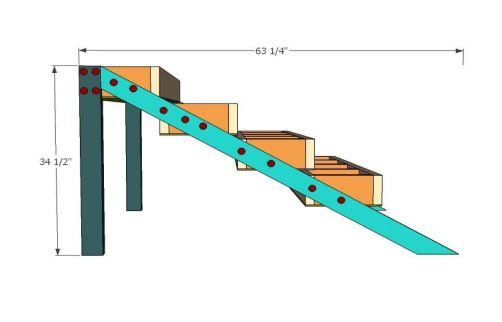
Side View:
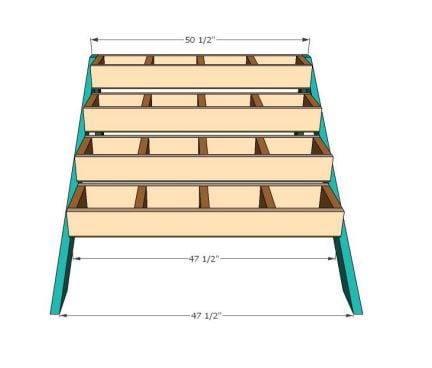
Front View:
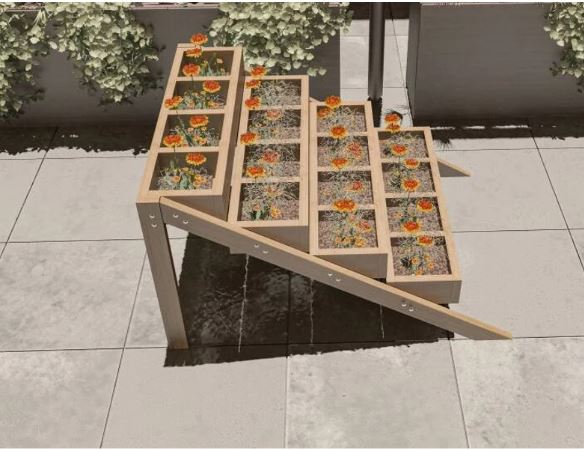
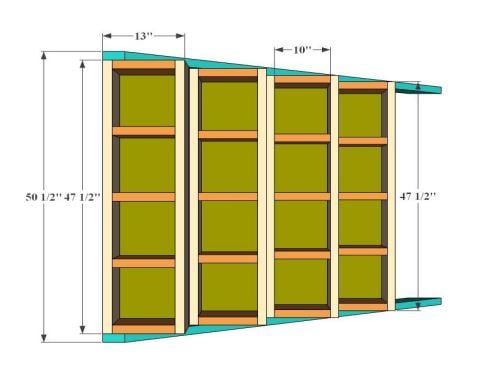
Top View:
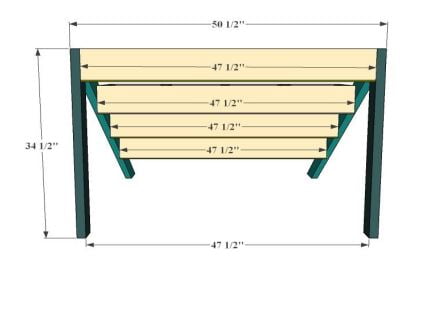
Back View:
Assembly Process:
Step 1:
Start by attaching five middle pods (B1) to each side stretcher (A1).
We screw the right and left sections from the back and front parts so that they fit on the edges.
Then we screw it from the front and back sides, leaving a 10'' gap between them.

Step 2:
We screw the C1 part to the A1 part from the right, left and middle parts.
Here, the thickness of the C1 piece will be 15/32'' and the width will be 13''.
Length will be 47 1/2''. If you want it to be more solid, you can add screws to the middle of the right and left sides.
Step 3:
Here we will measure and cut the top and bottom parts of our E1 side legs.
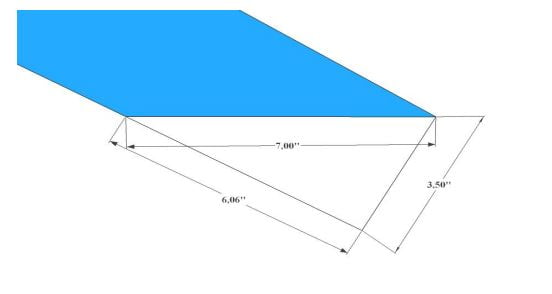
We measure an angle of 60 degrees at the bottom of the foot and measure and mark the 6.06'' distance upwards.
Then we cut from the other corner of the foot to the marked place.
Another method is to measure and cut a distance of 7'' from the corner of the foot to the opposite upside edge.
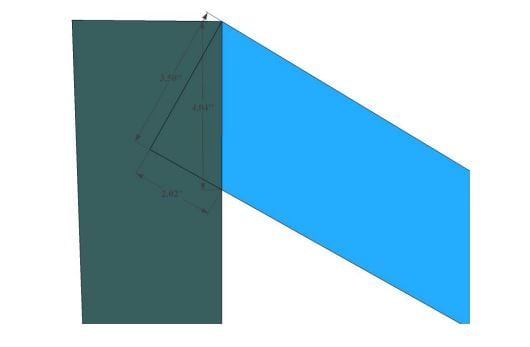
Measure and cut the upper part of the foot as in the lower part.
Measure 2.02'' from top to bottom and mark, then cut from the other corner to the marked place.
Step 4:
Here we will complete the legs and side supports of our ladder flowerpot. We connect the D1 part and the E1 part.
We will use a pocket hole screw from the top and bottom of the E1 part.
We drill our pocket hole screw holes in the E1 parts.
We use 2 1/2'' pocket hole screws.
Step 5:
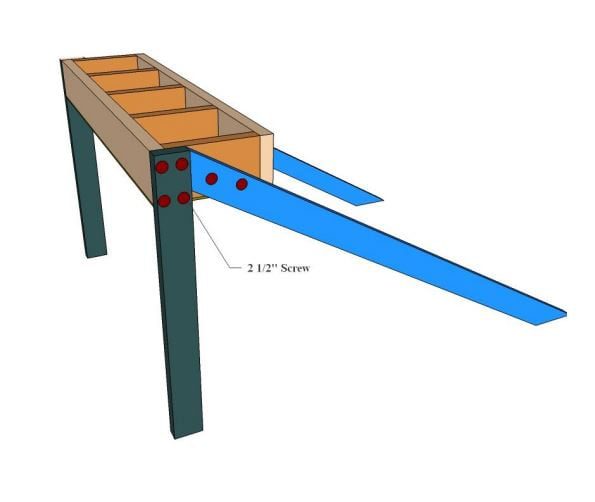
Glue the potting box to the D1 pieces so that there are no gaps from above and to the left, and then screw them on. Here we will use 2 1/2" screws.
Screw in as often as you can to ensure stability. We also screw the B1 part. We repeat the same operations on the other side.
Step 6:
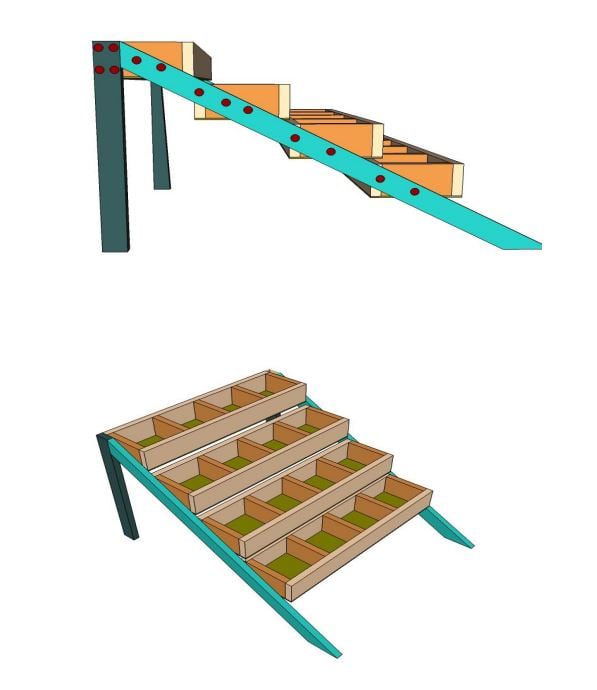
From top to bottom, we place the second box so that it is at the end of the first box.
Then we screw the second, third and fourth boxes, respectively, as in the previous operation.
Here is something to pay attention to; We adjust and screw the fourth box in such a way that it is slightly in line with the third box in terms of the stability of the system.
Here we will use 2 1/2" screws. It will be as shown in the second picture below
Notes:
It will be easier to stain the separately before you finish assembling the Flower Pot, especially if you use two different stain colors like.
First, sand the wood with 200 grit or higher sandpaper to achieve a smooth, even surface before staining.
Thoroughly remove all dust from the wood by using a vacuum with a hose attachment, then wiping clean with a damp cloth. You can make screw from the suitable parts for reinforcement.
To finish, fill any visible holes with wood filler then sand everything down really well.
This is the most important step for a professional finish! Start with a rough sand paper, then go over everything with a medium paper, then again with a fine paper.
Once it's super smooth, finish it with whatever paint or stain and sealer you like. We have completed our Project

