How To Build a French Cleat Wall

Note: All projects performed following instructions found on this site are done at your own risk. Learn more
These instructions will build one 4x8’ section of French cleat wall, but cant be repeated to make
additional sections if desired.
The dimensions shown for this lumber rack and its components can be altered to accommodate your specific needs.
All dimensions are in standard measurements (inches).

Materials List
Wood Qty
- 2”x4” Scrap Peices
- 3/4” Plywood 2 (4’x8’ sheets)
- Optional Alternate 1”x6” Boards 4
Hardware Qty
- 1.25” Wood Screws Approx. 50
- 2.5” Wood Screws Approx. 25
- 1.25” Brad Nails Approx. 65
Tools
Note: As an Amazon Associate, I earn from qualifying purchases.
PLYWOOD CUT SHEETS

PREP COMPONENTS
Cut Components
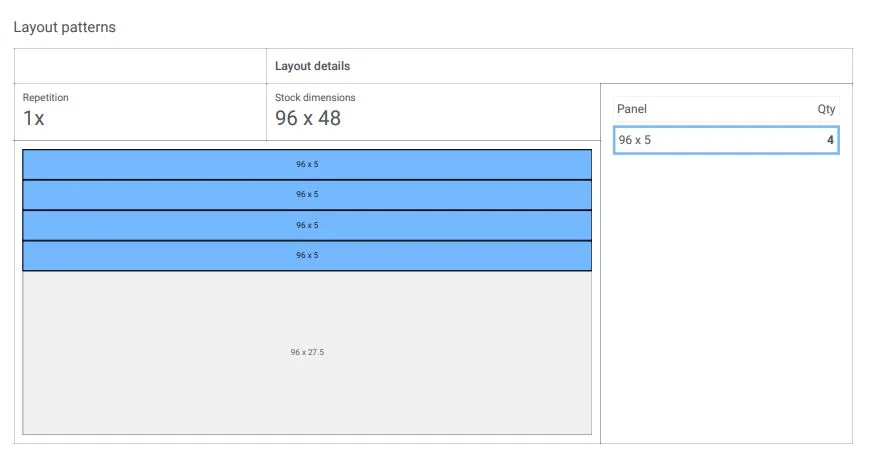
1. Measure and Cut 1 sheet of 3/4” plywood into 5”x96” strips (This can be done using circular saw, track saw or table saw)
2. You may also use 1”x6” boards as a substitute for plywood in this step.

*NOTE: The size of these strips may be altered if you wish to create larger cleats
Cut Cleats
1. Mark the 5”x96” strips at the 2-1/16” (2.0625”) position along the length of the strip (Measurement assumes a blade kerf of 1/8”)
2. Cut along the length of the strip at a 45 degree angle creating 2 sections of French cleat with the measurments shown below.
If using a table saw for this step, set your table saw fence at 2-1/16” and set the blade at a 45 degree angle.


*NOTE: The measurement shown in the image above is a close appoximation and does not account for the kerf of the cutting blade
INSTALLATION AND ASSEMBLY
Fasten Plywood To Wall
1. Locate the studs on the wall.
2. Using a level, measure and mark the location for the French cleat system.
3. Secure a sheet of plywood to the wall with 2.5”-3” wood screws making sure that it is level. Fasten to studs to insure a strong connection.
If mounting to metal studs, adjust hardware accordingly.

*NOTE: This step may not be neccesary if you plan to mount your french cleats to a strong flat surface.
Prep Cleats
1. Apply a thin layer of wood glue to the back of the French cleats as shown below being sure that no glue is applyed to the 45 degree angled portion.

INSTALLATION AND ASSEMBLY
Mounting French Cleats
1. Fasten the first cleat to the wall flush with the bottom of the plywood sheet using brad nails. Orient the cleat as shown below with the angled portion pointing upward.
2. Use 2”x4” blocks to create the proper spacing between each cleat
3. Continue these steps to fasten all cleats to the wall.

Reinforce each French cleat with 1.25” countersunk wood screws evenly spaced along the length of the cleats.
This step is not absolutely necessary but will create the strongest possible mounting system.

Congratulations!
Your French cleat wall is complete!


These plans are designed to build 1- 4'x8'" section of French cleat wall mounting system, however, the plans can be customized to fit your needs.
