Folding Kentucky Stick Chair

Note: All projects performed following instructions found on this site are done at your own risk. Learn more
Introduction:
Folding wood chairs that are really comfortable.
It simply involves cutting all the pieces (sticks) to length, drilling holes through all the pieces at
the given points, and then threading wire through the holes to tie all the pieces together.
You end up with a comfortable chair that can easily be folded up and stored, or carried. Sit in it, and you won’t want to get out.
Stick chair project
Dimensions given throughout this project are in both imperial (inches) and metric (mm).
The imperial measurements are given first, followed by the metric measurements in brackets ( ).
Wood size (width and thickness) and alternative sizes
The stock size used in this project is 1½” x 1¼” (45mm x 33mm). This is not a common size in a lot of places.
If you cannot obtain this stock size or anything close, then you can rip (cut length-wise) an acceptable size from a wider stock.
For example, you could rip three equal size pieces out of 2″ x 4″ (100mm x 50mm) stock. The size (width and thickness) of the stock that you use does not have to be exactly the same size as the stock size used in this project, as long as it is anywhere near and all the pieces are uniform
What you will need
You will need 54ft (16.5m) of 1½” x 1¼” (45mm x 33mm) wood. If you cannot source the stock size, read the above paragraph.
You will need 4 pieces of approximately 5/32″ (4mm) diameter galvanized mild steel wire – 32″ (800mm) long.
The wire size mentioned above is the approximate size (for rounding off purposes) of 6 gauge AWG (American Wire Gauge), which is the same as 8 gauge British SWG (Standard Wire Gauge), also referred to as number 8 wire (NZ).
The cutting list
Note: If you cannot obtain the exact stock size as listed in the cutting list below, refer to the paragraph ‘Wood size (width and thickness) and alternative sizes’.


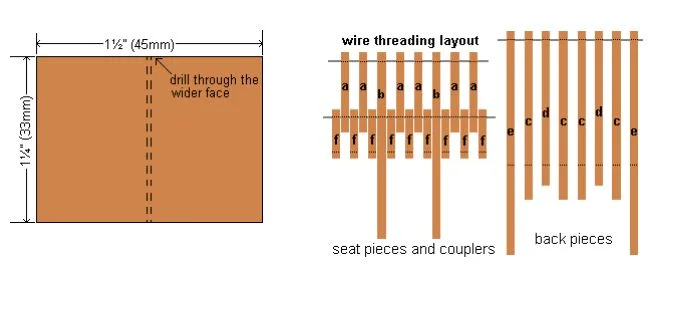
Plan drawing – Where to drill the holes
Below is a drawing of all the pieces giving the dimensions for the hole positions.

Refer to the cutting list on the previous page for the lengths of the individual pieces. Make all the holes ¼” (6mm) diameter and drill through the wider face of the wood.
In other words, the wood size is 1½” x 1¼” (45mm x 33mm), therefore drill through the 1½” (45mm) wide face.
Cutting, drilling, and aligning the pieces
Step 1. Cut and drill the pieces
Cut all the pieces according to the cutting list on the previous page. There will be 25 pieces altogether and eachpiece will need to have 2 holes drilled through it.
Make the holes ¼” (6mm) thick and ensure that they are allin the center of the wider side of the wood.
Position two holes along each piece as follows:
- Pieces (a) and (b). Measure from one end 1½” (37mm) and 12″ (300mm).
- Pieces (c), (d), and (e). Measure from one end 1½” (37mm) and 25″ (625mm).
- Pieces (f). Measure in from both ends 1¼” (31mm). Refer to the “where to drill the holes” drawing on the previous page for a bit of a visual guidance.
Preferably use a drill press to ensure the holes are straight and at right angles to the face of the wood. This will make it easier to align the pieces and thread the wire.
Note: As an Amazon Associate, I earn from qualifying purchases.

Step 2. Align the seat pieces
Lay the seat pieces in a row, spaced apart about a thickness of a piece, in this order (a) (a) (b) (a) (a) (b) (a) (a) with the holes lined up.
Thread a piece of approximately 5/32″ (4mm) thick mild steel galvanized wire through the top holes. See the photo

Note: The holes are ¼” (6mm) diameter. That is about 3/32″ (2mm) more than the thickness of the wire. A bit of play is necessary in order to easily thread the wire.
The assembly order by drawings.
A visual guidance showing the assembly process

Threading the wire
Step 3. Add the couplers
Position the couplers (f) in a row, one each side of the two end seat pieces and one in between each seat piece. Align the holes in the couplers with the lower holes in the seat pieces, and thread another length of wire through the holes.

Note: The wire is longer than need be at this stage. It can be cut to suit later on
Step 4. Thread more wire
Lay the back pieces in a row, spaced apart a thickness of a piece, in this order (e) (c) (d) (c) (c) (d) (c) (e) with the top holes in line.
Thread wire through the top hole.
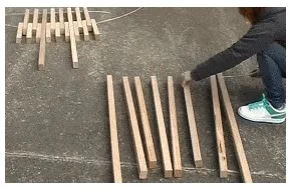
Note: The holes should be bigger than the wire to allow ease of threading. Refer to Step 1.
Step 5. Sit the back pieces on top of the seat pieces
Move the back pieces over the seat pieces. Sit each back piece (e), (c), (d), (c), (c), (d), (c), (e), on top of each seat piece (a), (a), (b), (a), (a), (b), (a),(a), respectively.

For further visual reference see the ‘step 5 drawing’ at page 6.
More wire threading
Step 6. The last wire
Slide the back pieces forward along the seat pieces so that the ends of the back pieces overhang the seat pieces by approximately 6½” (163mm).
For further visual reference see the ‘Step 6 drawing’ at the bottom of the previous page.

Align the coupler holes with the back piece lower holes, and thread wire through them.
Step 7. All the wire in
And that’s all the wire in place. Four lengths in all. At this stage everything is fairly loose.

All the wire is longer than required and will be cut off in due course.
Step 8. Push the top in
Give the top a bit of a squeeze in. This is really the interesting part because you will now get to see how the chair unfolds.

Simply grab the wire at each end of the chair top and lift the unit up so it’s upright and on its legs
Unfolding the chair
Step 9. The chair unfolding
Simply grab the wire at each end of the chair top and lift the unit up so it’s upright and on its legs.

This is one of the most rewarding stages of the project – seeing it fold into a chair.
Step 10. Squeeze the pieces in
Squeeze the top of the back pieces together: i.e. just with your hands, push the pieces together until they touch.
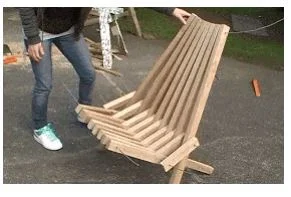
The wire is longer than necessary at this stage and will need trimming.
Step 11. Snip the wire
When the top of chair is pushed together, cut the wire at each side leaving a “2” (50mm overhang. (Note alternative fastening option before Step 14 which requires a shorter overhang.

This can be done with a tool such as a bolt cutter, a wire cutter, heavy pliers, or a hacksaw
Step 12. Fold and staple
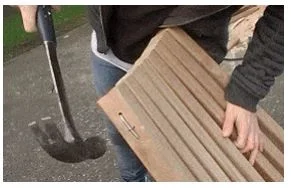
Fold the wire over and fasten with two galvanized wire staples, at each fold.

Final touches and a bit of sanding
Step 13. Snip more wire
Ensure the sides (where the couplers are) and the seat ends are all pushed together, and cut the rest of the wire leaving a 2″ (50mm) overhang at every point.

Then, with a hammer, bend the overhangs over against the wood and fasten each bend with two galvanize staples.
Alternative fastening
If you prefer a more polished look (fastening-wise), another option is to make a thread on the ends of the wire, and then secure each end with a washer and dome nut.
This would mean leaving approximately a ⅜” (10mm) overhang on the wire at each point rather than the 2″ (50mm) overhang and making a thread on the ends of the wire.

A thread can be easily made with a tool called a ‘die’.
Step 14. A bit of sanding
Finally, a bit of sanding. Get rid of all the sharp edges and that’s about it.
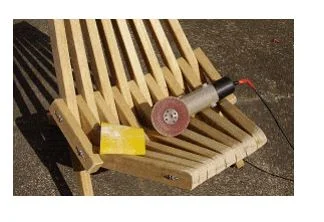


This durable chair can be built in a weekend and is designed to last.
